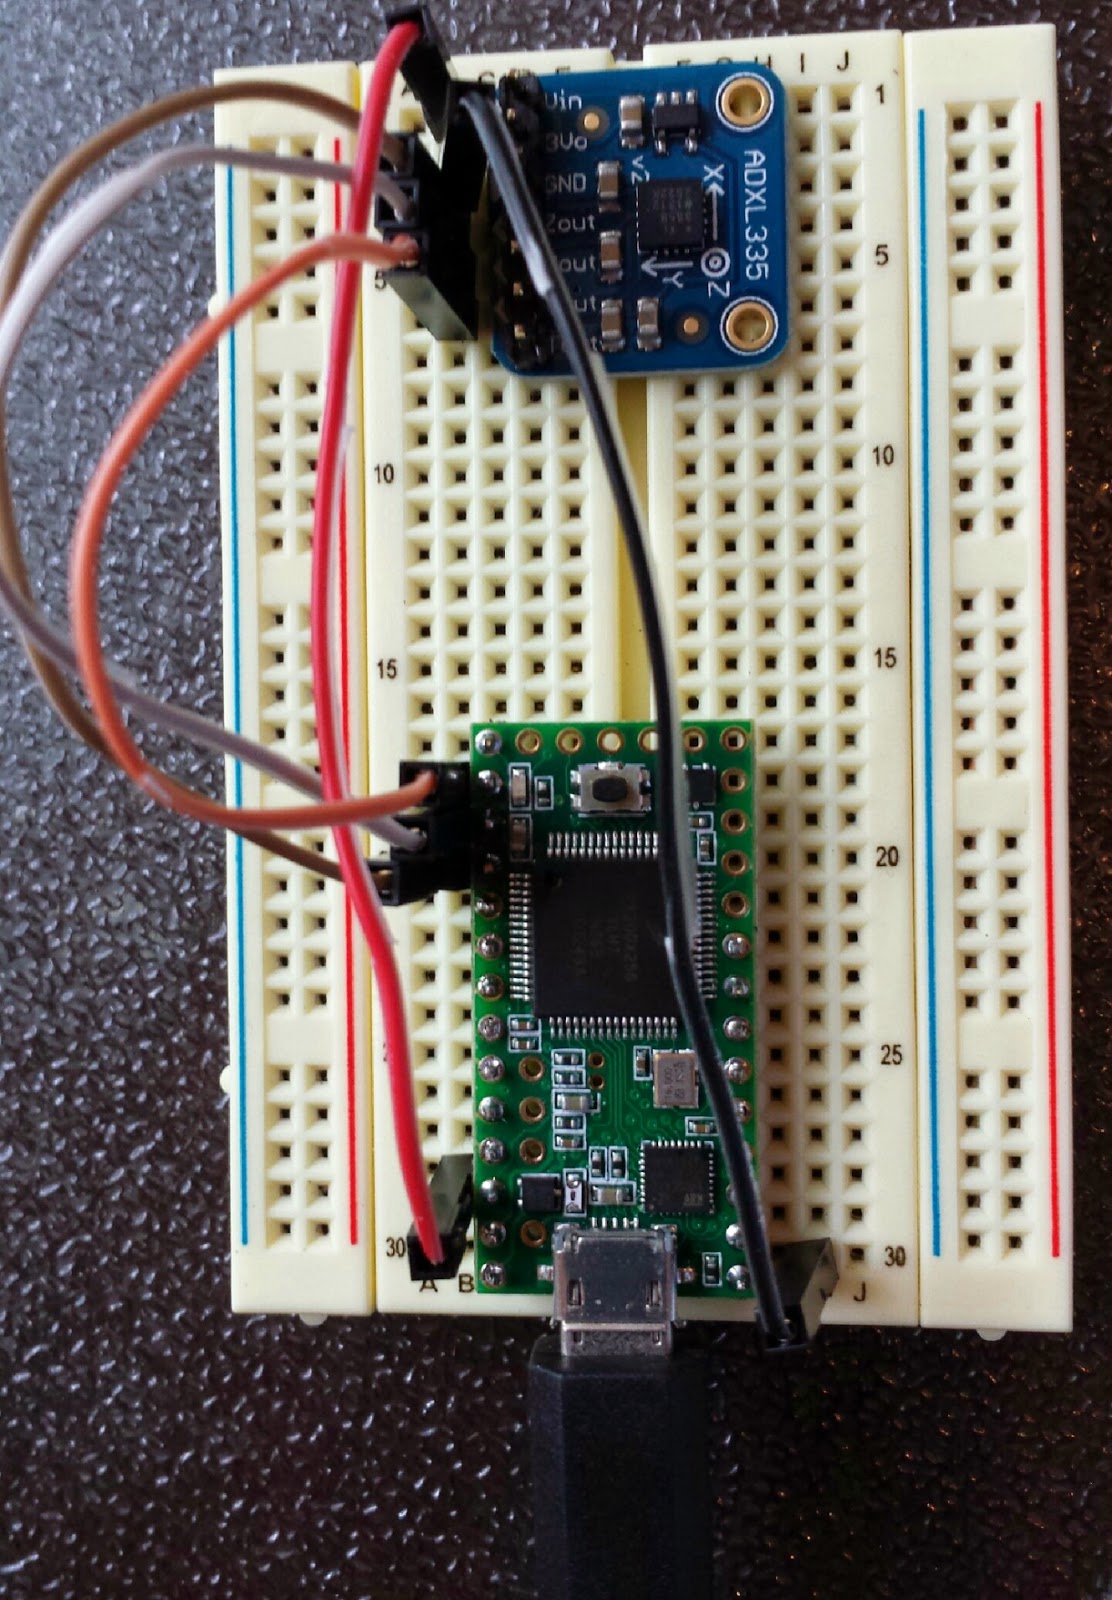
This is a little project to get started with the Teensy 3.1 and a triple-axis accelerometer. I want to get data from the accelerometer in a form that can be used by an application so the code in the end normalizes the values to the G forces measured and outputs the values o the USB serial port.

This project only requires a couple parts. You will also need some wire, a small breadboard and a micro USB cable. You will also want the pin out for the Teensy 3.1.
Parts List
ADXL335 - Triple Axis Accelerometer ($14.95)
Teensy 3.1 Development Board ( $19.80)
Total Cost $35
Step 1 - Circuit Setup
I used analog input pins A0, A1, and A2 for the x,y,z outputs from the accelerometer and powered the accelerometer directly from the 3.3V output of the Teensy. I soldered headers onto the the Teensy's side pins to make it breadboard friendly.
Step 2 - Programming Environment Setup
The Teensy can be programmed through the Arduino IDE with the Teensyduino add on and a micro USB cable. Many of the Arduino libraries are also compatible with the Teensy.
- Download and install the Arduino IDE if you do not already have it.
- Download and install the Teensyduino add on for the Arduino IDE.
- Download the Teensy loader program for your OS .
Next we need to calibrate the Accelerometer.
Step 3 - Accelerometer Calibration
We need to determine the max and min values for each axis of the accelerometer. To do this, you need get multiple readings with the accelerometer oriented in the min and max positions along each of the axis. The values will be used as constants in the code that will run on the Teensy to get scaled readings.
I used a modified procedure based on the calibration instructions on the Adafruit learning site to calibrate my accelerometer because I didn't want to do any additional hardware setup.
Compile and Load the Calibration code
- Download the ADXL335 Calibration sketch and open it in the Arduino IDE.
- Open the calibration sketch in your Arduino IDE.
- Plug in the Teensy micro USB cable.
- Select Teensy 3.1 as the board under Tools -> Board -> Teensy 3.1
- Verify that the correct COM port is selected for the Teensy under Tools->Serial Port. (It will probably be the only one shown unless there are other COM devices connected to your computer.)
- Compile/Verify the sketch by typing Ctrl+R or clicking on the check mark icon near the top left corner.
- When the sketch is done compiling, the Teensy Loader will open automatically.
- With the Teensy Loader in Auto mode (the Auto button is green as shown below), press the button on the Teensy board to upload the calibration code.
Perform the Calibration
- Open the Serial Monitor under Tools-> Serial Monitor in the Arduino IDE.
- Set the baud rate. The baud rate can be set to 38400 using the drop down at the bottom right corner of the Serial Monitor window.
- Place the Accelerometer circuit on a flat surface to get the Z-max value.
- Send a "1" to the Teensy using the Serial Monitor Send feature to run the calibration code. You should see output in the Serial Monitor as shown below. Notice that the upper range for Z is now 612, this is the max value for Z when the board is at rest. The X and Y Min values have changed too, but we are not done with those yet.
- Hold the Accelerometer circuit upside down against a flat surface(such as the underside of a table) to get the Z-min value. (Hold it still during the measurement).
- Again, send a "1" to the Teensy using the Serial Monitor Send feature to run the calibration code. A second calibration output will appear in the Serial Monitor as shown below. Now the lower range for Z will have changed, in my measurement, it was measured at 413 as shown below.
Measure the Y-Max, Y-Min, X-Max, and X-Min Values
Repeat the procedure above with the circuit oriented in the Max and Min positions for the X and Y axis's using the following orientations:
Y-Max: Y arrow on the accelerometer should be pointing straight up.
Y-Min: Y arrow on the accelerometer should be pointing straight down.
X-Max: X arrow on the accelerometer should be pointing straight up.
X-Min: X arrow on the accelerometer should be pointing straight down.
The min max values for each axis are retained through calibration runs so the final output will have the min and max ranges for the raw values for each axis. These values will be used as constants in my code to normalize the output values.
Step 4 - Program the Teensy
Step 4 - Program the Teensy
Now that we have the min max values to use, we use the values in code to send normalized values between 1 and -1 for the x, y, and z orientations detected by the accelerometer.
- Download the Teensy Accelerometer Code.
- Open the TeensyAdxl335.ino sketch and change the min/max values for each axis to the values measured in the calibration above.
- Save and Verify/Compile, and upload the code to the Teensy using the same procedure described above to upload the calibration code.
- Use the Serial Monitor to verify the output from the Accelerometer. You should see the out values scrolling. The output should look like the view below.


No comments:
Post a Comment